Compressor first, limiter last, and that order is not a preference. On vocals start at 3:1 to 4:1 with a soft knee, a 10 to 20 ms attack and a 150 to 250 ms release, and set the threshold so the loudest phrases pull 4 to 6 dB of gain reduction. The limiter belongs on the main bus, 2 to 3 dB below clip, showing 1 to 3 dB at most.
This is the part of a live mix that separates a mix that sounds loud from one that sounds squashed. A compressor shapes dynamics because you want it to. A limiter exists to stop the desk, the amplifier or the driver being hit with something it cannot take, and it has to sit last in the chain.
The same two boxes also behave very differently depending on where they sit in the signal path. A compressor on a channel insert, before the fader, reacts to what the microphone gives you. The same compressor on a group or the main bus reacts to everything you have already done to that channel. Both are legitimate uses. Only one of them is the one you actually intended.
Which goes first, the compressor or the limiter?
Compressor first, limiter last. On the channel, on the group or on the bus, in that order.
The reason is arithmetic. A compressor reduces gain by a ratio: at 4:1, an input rising 8 dB above threshold comes out 2 dB above it. A limiter reduces gain by whatever it takes to hold a ceiling, so its reduction has no limit. If the limiter runs first, it eats the peaks and the compressor behind it sees a signal with no dynamics left to work on. The limiter ends up doing all the audible work while the compressor does almost nothing, which is the opposite of what both boxes are for.
The test takes thirty seconds. Bypass the compressor, push the channel until the limiter’s gain-reduction meter moves, then engage the compressor and watch the limiter’s meter fall back towards zero. If it does not fall back, the compressor’s threshold is too high to be doing anything useful and you are running a limiter alone.
Where should the limiter sit and how hard should it work?
On the main bus, last in the chain, and as little as possible. A limiter showing 1 to 3 dB of reduction on the loudest chorus is doing its job. One sitting at 6 dB all night is a sound design decision, not protection, and it flattens the mix in a way nobody downstream can undo.
Set the ceiling with the system already at show level, not at a comfortable rehearsal volume. Push the loudest expected passage, watch the output meter, and put the ceiling 2 to 3 dB below the point where the amplifier clips or the processor’s output limit engages. If the venue’s DSP already has a limiter, put yours above it and let the DSP be the last line of defence. Two limiters stacked in the wrong order is how a mix ends up with no transient left at all.
On a channel, a limiter is only worth inserting for one reason: a source that occasionally does something violent. A podium mic that gets thumped, a wireless handheld a singer cups, a DI on a bassist who slaps. Put the ceiling there and leave the compressor to do the shaping.
What settings should a vocal compressor start from?
Ratio 3:1 to 4:1, soft knee, attack around 10 to 20 ms, release around 150 to 250 ms, threshold set so the loudest phrases pull 4 to 6 dB of gain reduction. That is the starting point, not the answer.
Attack matters more than people expect. Too fast and the first consonant of every word goes down with the vowel behind it, and the singer starts to sound like they are lisping. Too slow and the transient slips through untouched while the sustain gets squashed, which reads as an inconsistent level. Somewhere around 10 to 20 ms is where most voices sit well; a very percussive voice wants faster, a legato ballad wants slower.
Release is where live sound differs from studio sound. Set it too slow and a loud phrase ducks the quiet phrase after it. Set it too fast and the compressor pumps audibly on every syllable. 150 to 250 ms is a safe band for speech and most singing. If the singer’s quiet passages disappear under the band, the release is too slow for the amount of reduction you are asking for.
Watch the gain-reduction meter, not the threshold number. The number on the dial means nothing on its own. Four to six dB of reduction on the loudest phrases with nothing happening on sustained notes is the target for a lead vocal; a backing vocal that only needs to sit under the lead can work at 2 to 3 dB.
How is a drum compressor different?
Drums want faster, harder and paired. Kick and snare individually get attack times in the 1 to 5 ms range so the beater and the stick crack stay intact, with releases matched to the tempo so the compressor is back at unity before the next hit. Ratios of 4:1 to 6:1 are normal, and 8:1 or higher is not unusual on a kick in a loud room.
The important part is linking. Compress kick and snare separately and unlinked, and every kick hit ducks the snare channel by a different amount than the snare ducks the kick, so the two drift out of balance all night. On a stereo pair, always link: a drum overhead pair compressed with independent channels will shift its stereo image every time the drummer leans on one side of the kit.
The other drum-specific trap is using the compressor as a level control. A compressor does not fix a drummer whose dynamics vary by 20 dB; it makes the problem louder for longer. Compression on drums shapes the envelope of a hit, it does not even out a performance.
What does the knee setting actually change, and when do you use hard knee?
Soft knee starts reducing gain gradually before the threshold and reaches full ratio some distance above it. Hard knee applies the ratio exactly at the threshold. Soft knee sounds smoother and is the default for voices and program material. Hard knee sounds more assertive and suits limiting and anything where the compression should be decisive rather than gentle.
The difference is audible on sustained material. A bass note held for two seconds compressed with a soft knee fades into compression gradually, which can read as a note getting quieter over time. The same note with a hard knee stays at one level immediately. For protection work hard knee is almost always correct; for tone shaping soft knee usually is.
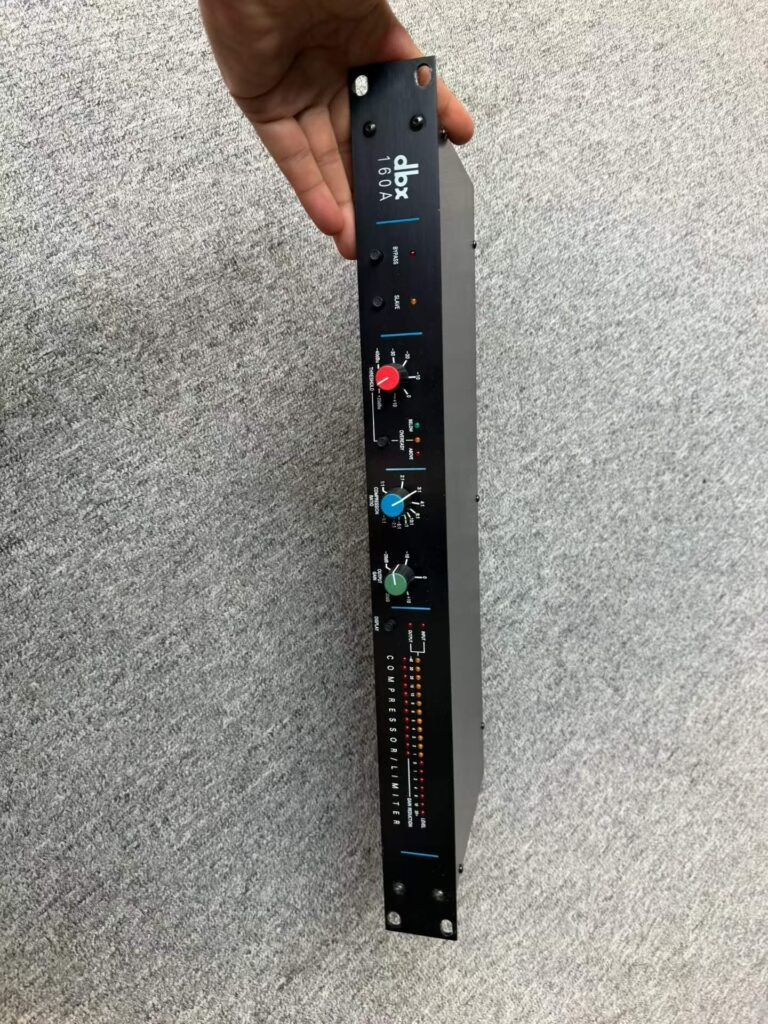
The dbx 160A is a good reference point because it exposes exactly this choice with a single switch. Its OverEasy setting is the soft knee, its hard knee position is the hard one, and the ratio runs continuously from 1:1 to infinity:1. In the hard-knee, infinity-ratio position it is a limiter and not a compressor, which is worth remembering when you build a protection chain.
Is hardware worth it over plugins for live compression?
For the limiter on the main bus, hardware is worth considering because a hardware limiter keeps working if the laptop does not. Everything else is fine on plugins in a modern digital desk, and often better, because recall matters more in live work than the last percent of tone.
Where hardware still earns its place is on the insert of a channel that never changes: a talkback mic, a podium, a fixed announce position. A box with three knobs that turns on and works, in a rack, has a reliability value no plugin has. That is the case a used dbx 160A makes for itself, and the case our used dbx 160A is in stock for.
Whatever you choose, the chain order and the amount of reduction you allow decide whether the result sounds professional. The box is almost the least interesting part of the question. If you are rebuilding a rack, the used mixer listings show what consoles and processing are in stock and ship as one lot.
Key takeaways
- Compressor before limiter, always: the limiter is the last ceiling, not a dynamics tool.
- Vocals: 3:1-4:1, soft knee, 10-20 ms attack, 150-250 ms release, 4-6 dB reduction on loud phrases.
- Drums: faster attack, 4:1-6:1, and link every stereo pair so the image does not drift.
- 1-3 dB of reduction on the main-bus limiter is protection; 6 dB all night is a sound design choice.
- Hard knee for limiting and protection, soft knee for tone shaping on voices and program material.